Xamarin Android Login With Facebook Authentication
Introduction
Facebook Login is an easy way for users to log in. Facebook users can grant permissions to our app; thereby retrieving all the user information.
Let’s start
Before starting Android Application creation, we need to register Facebook Developer account’s new Application.
Step 1
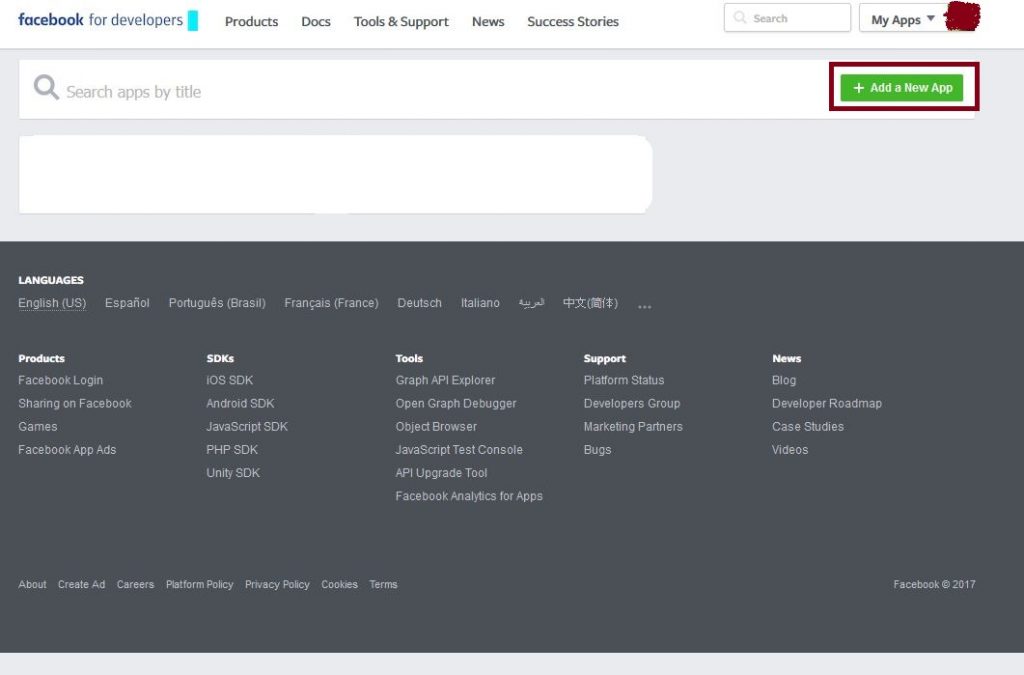
Go to https://developers.facebook.com. Check the page right side corner +Add a New app. Now, click the button, open one more Window for app creation. It asks for Display Name and Contact Email, followed by clicking Create App ID button and then finally asks for security information. Check option afterwards and create your own app ID for our Application name.


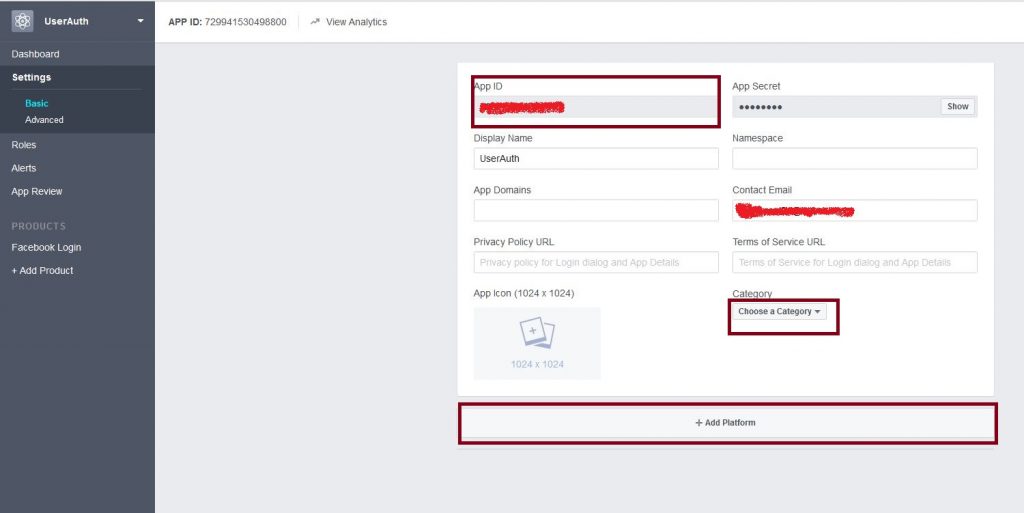
Step 2: Now, go to AppName->Settings->Basic. When it is clicked, it shows an App ID and some data is retrieved. Now, at the bottom of the page , Add Platform and click this button.
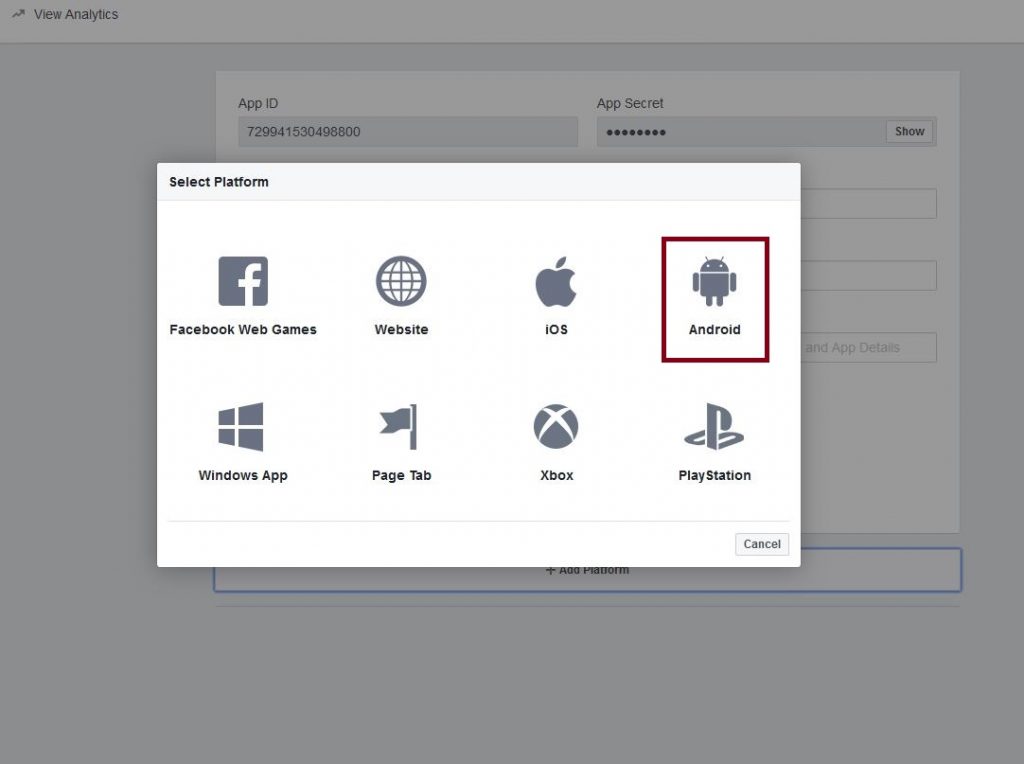
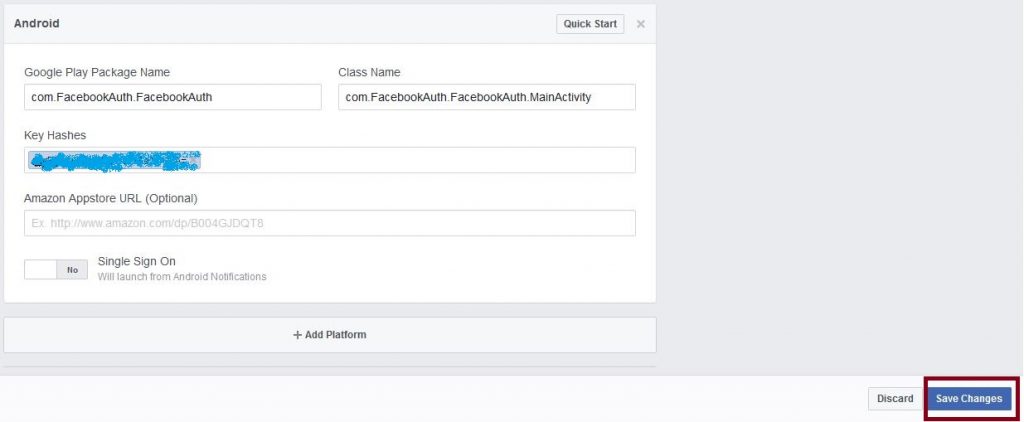
Step 3 : Afterwards, select the platform for an Android, followed by giving the Package name, Class Name and Key Hashes [Create Key Link . http://www.c-sharpcorner.com/article/xamarin-android-create-an-sha-1-key-for-google-map-app-deve/
Step 4: Open Visual Studio->New Project->Templates->Visual C#->Android->Select Blank App. Now, give the Project Name and Project Location.

Step 5 : Now, go to Solution Explorer-> Project Name-> References. Right click to Manage Nuget Packages, followed by opening new Dialog box. This dialog box helps to search Facebook Android, followed by installing Xamarin.Facebook.Android Packages.
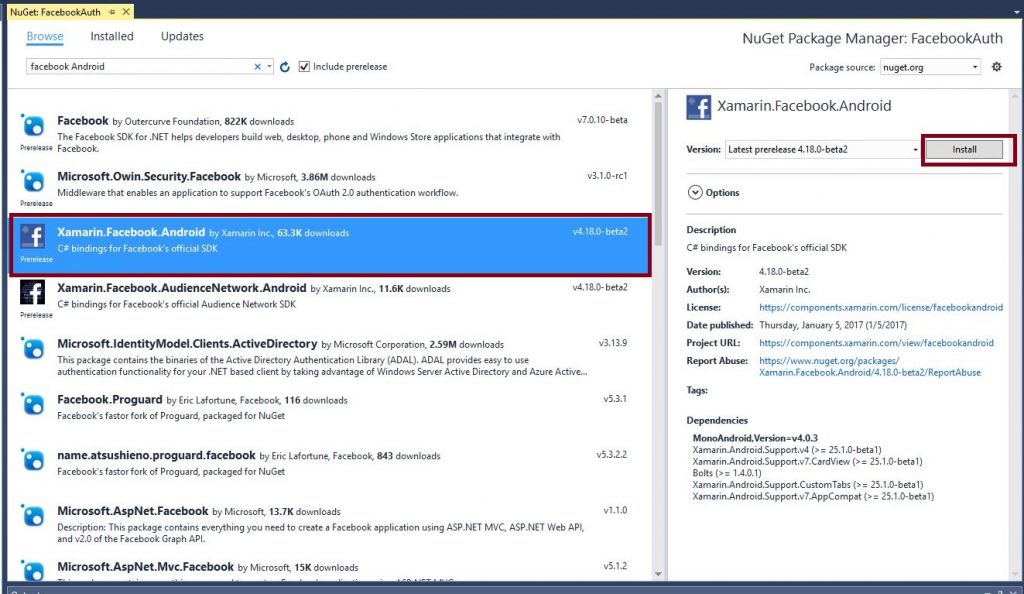
Step 6: Open Solution Explorer-> Project Name->Resources->layout->Main.axml. Click Open Design View.

AXML code :
<?xml version="1.0" encoding="utf-8"?>
<LinearLayout
 xmlns:android="http://schemas.android.com/apk/res/android"
 android:orientation="vertical"
 android:layout_width="match_parent"
 android:layout_height="match_parent">
 <com.facebook.login.widget.LoginButton
 android:id="@+id/fblogin"
 android:layout_width="wrap_content"
 android:layout_height="wrap_content"
 android:layout_marginTop="40dp"
 android:layout_gravity="center_horizontal" />
 <com.facebook.login.widget.ProfilePictureView
android:id="@+id/ImgPro"
android:layout_width="150dp"
android:layout_height="150dp"
android:layout_marginTop="20dp"
android:layout_gravity="center_horizontal" />
 <TextView
 android:text="First Name"
 android:textAppearance="?android:attr/textAppearanceMedium"
 android:layout_width="wrap_content"
 android:layout_height="wrap_content"
 android:id="@+id/TxtFirstname"
 android:layout_centerHorizontal="true"
 android:layout_gravity="center_horizontal"
 android:layout_marginTop="20dp" />
 <TextView
 android:text="Last Name"
 android:textAppearance="?android:attr/textAppearanceMedium"
 android:layout_width="wrap_content"
 android:layout_height="wrap_content"
 android:id="@+id/TxtLastName"
 android:layout_centerHorizontal="true"
 android:layout_gravity="center_horizontal"
 android:layout_marginTop="10dp" />
 <TextView
 android:text="User Name"
 android:textAppearance="?android:attr/textAppearanceMedium"
 android:layout_width="wrap_content"
 android:layout_height="wrap_content"
 android:id="@+id/TxtName"
 android:layout_centerHorizontal="true"
 android:layout_gravity="center_horizontal"
 android:layout_marginTop="10dp" />
</LinearLayout>
Step 7 : Now, open Solution Explorer-> Project Name->MainActivity.cs. Click Open CS code page view, followed by adding namespaces given below.
![]()
using Xamarin.Facebook.Login.Widget;
Step 8: Add public class MainActivity: Activity,IFacebookCallback Interface.
![]()
Step 9 : Create new variables followed by assigning all the variables values.

C# Code:
 private ICallbackManager mFBCallManager;
 private MyProfileTracker mprofileTracker;
 private TextView TxtFirstName;
 private TextView TxtLastName;
 private TextView TxtName;
 private ProfilePictureView mprofile;
 LoginButton BtnFBLogin;
 protected override void OnCreate(Bundle bundle) {
 base.OnCreate(bundle);
 FacebookSdk.SdkInitialize(this.ApplicationContext);
 mprofileTracker = new MyProfileTracker();
 mprofileTracker.mOnProfileChanged += mProfileTracker_mOnProfileChanged;
 mprofileTracker.StartTracking();
 // Set our view from the "main" layout resource
 SetContentView(Resource.Layout.Main);
 BtnFBLogin = FindViewById < LoginButton > (Resource.Id.fblogin);
 TxtFirstName = FindViewById < TextView > (Resource.Id.TxtFirstname);
 TxtLastName = FindViewById < TextView > (Resource.Id.TxtLastName);
 TxtName = FindViewById < TextView > (Resource.Id.TxtName);
 mprofile = FindViewById < ProfilePictureView > (Resource.Id.ImgPro);
 BtnFBLogin.SetReadPermissions(new List < string > {
 "user_friends",
 "public_profile"
 });
 mFBCallManager = CallbackManagerFactory.Create();
 BtnFBLogin.RegisterCallback(mFBCallManager, this);
 }

C# Code:
public void OnCancel() {}
public void OnError(FacebookException p0) {}
public void OnSuccess(Java.Lang.Object p0) {}
void mProfileTracker_mOnProfileChanged(object sender, OnProfileChangedEventArgs e) {
 if (e.mProfile != null) {
 try {
 TxtFirstName.Text = e.mProfile.FirstName;
 TxtLastName.Text = e.mProfile.LastName;
 TxtName.Text = e.mProfile.Name;
 mprofile.ProfileId = e.mProfile.Id;
 } catch (Java.Lang.Exception ex) {}
 } else {
 TxtFirstName.Text = "First Name";
 TxtLastName.Text = "Last Name";
 TxtName.Text = "Name";
 mprofile.ProfileId = null;
 }
}
protected override void OnActivityResult(int requestCode, Result resultCode, Android.Content.Intent data) {
 base.OnActivityResult(requestCode, resultCode, data);
 mFBCallManager.OnActivityResult(requestCode, (int) resultCode, data);
}

public class MyProfileTracker: ProfileTracker {
 public event EventHandler < OnProfileChangedEventArgs > mOnProfileChanged;
 protected override void OnCurrentProfileChanged(Profile oldProfile, Profile newProfile) {
 if (mOnProfileChanged != null) {
 mOnProfileChanged.Invoke(this, new OnProfileChangedEventArgs(newProfile));
 }
 }
}
public class OnProfileChangedEventArgs: EventArgs {
 public Profile mProfile;
 public OnProfileChangedEventArgs(Profile profile) {
 mProfile = profile;
 }
 Extract or delete HTML tags based on their name or whether or not they contain some attributes or content with the HTML editor pro online program.
}
Step 10 : Click Solution Explorer->Project Name->Properties-> AndroidManifest.xml file.
XML Code :
 <?xml version="1.0" encoding="utf-8"?>
 <manifest xmlns:android="http://schemas.android.com/apk/res/android" package="com.FacebookAuth.FacebookAuth" android:versionCode="1" android:versionName="1.0">
 <uses-sdk android:minSdkVersion="16" />
 <application android:label="FacebookAuth">
 <meta-data android:name="com.facebook.sdk.ApplicationId" android:value="YOUR API KEY" /> </application>
 </manifest>
Step 11 : Press F5 or build and run the Application.

Download Source Here..
Finally, we successfully created Xamarin Android app login with Facebook authentication.

Anbu Mani(Microsoft MVP) is working Software Engineer in Changepond Technologies, Chennai, Tamilnadu, India. Having 4+ years of experience and his area of interest is C#, ASP.NET, SQL Server, Xamarin and Xamarin Forms,Azure…etc
