Xamarin.Forms – DataGrid
Introduction
The DataGrid is format or architecture to show a set of data in the user interface. In Xamarin Forms there is no default DataGrid control, so we need to install “Xamarin.Forms.DataGrid” dependency.
Let’s start 🙂
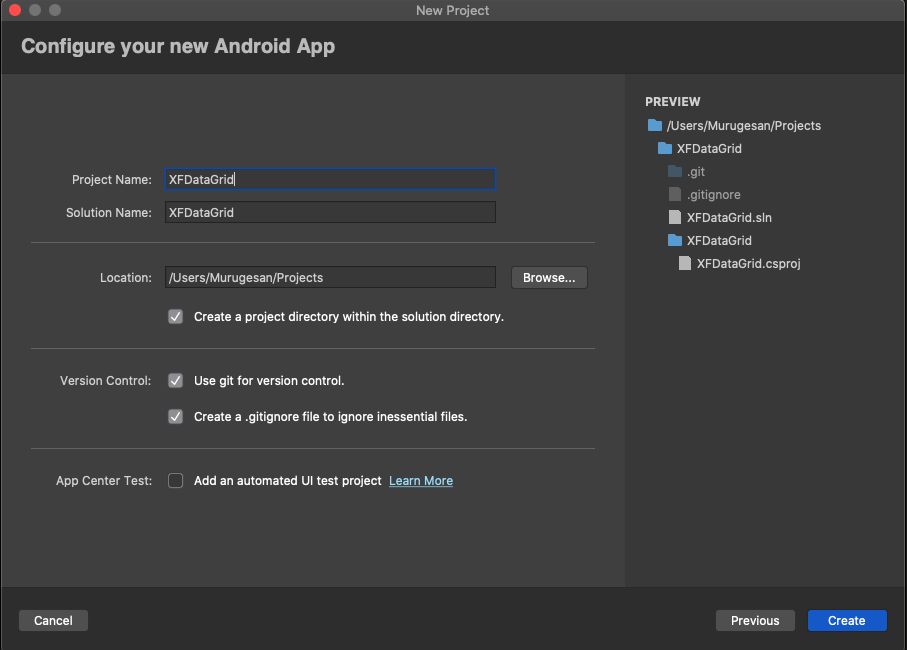
Create new Xamarin.Forms application in Visual Studio for Mac
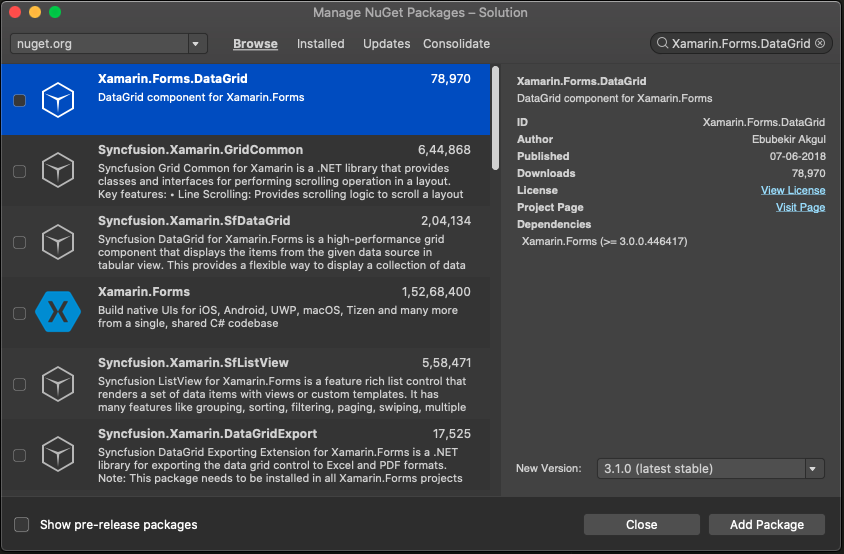
Once Project created, install “Xamarin.Forms.DataGrid” dependency by going, the Solution Explorer >> right-click and select “Manage NuGet Packages” >> in the new dialog, top right corner search “Xamarin.Forms.DataGrid” and Install it.
Create an MVVM folder structure, create a Professional.cs model class under the Model folder. For that, open Solution Explorer >> right-click the Model folder and select Add > new class and give name as Professional.cs. The class code is given below.
using System;
namespace XFDataGrid.Models
{
    public class Professional
    {
        public string Id { get; set; }
        public string Name { get; set; }
        public string Desigination { get; set; }
        public string Domain { get; set; }
        public string Experience { get; set; }
    }
}
Now, create another DummyProfessionalData.cs class under the Utils folder for dummy data. This class used for creating dummy data and code is given here.
using System;
using System.Collections.Generic;
using XFDataGrid.Models;

namespace XFDataGrid.Utils
{
    public static class DummyProfessionalData
    {
        public static List<Professional> GetProfessionals()
        {
            var data = new List<Professional>();
            var person = new Professional()
            {
                Id = "3",
                Name = "Monkey",
                Desigination = "Developer",
                Domain = "Mobile",
                Experience = "1"
            };

            for (int i = 0; i < 10; i++)
            {
                data.Add(person);

            }
            return data;
        }
    }
}
Next, Create MainPageViewModel.cs class under ViewModel folder and write given below code. Here, List and IsRefreshing properties and refresh commend are written, and when the user swipe top to bottom, the refresh command will execute and refresh the UI with updated data. INotifyPropertyChanged property also implemented to invoke the UI with new Data. The Professional Property for single data selection.
using System;
using System.Collections.Generic;
using System.ComponentModel;
using System.Threading.Tasks;
using System.Windows.Input;
using Xamarin.Forms;
using XFDataGrid.Models;
using XFDataGrid.Utils;

namespace XFDataGrid.ViewModels
{
    public class MainPageViewModel : INotifyPropertyChanged
    {
        private List<Professional> _professionals;
        private Professional _selectedProfessional;
        private bool _isRefreshing;

        public List<Professional> Professionals
        {
            get
            {
                return _professionals;
            }
            set
            {
                _professionals = value;
                OnPropertyChanged(nameof(Professionals));
            }
        }
        public Professional SelectedProfesstional
        {
            get
            {
                return _selectedProfessional;
            }
            set
            {
                _selectedProfessional = value;
                OnPropertyChanged(nameof(SelectedProfesstional));
            }
        }

        public bool IsRefreshing
        {
            get
            {
                return _isRefreshing;
            }
            set
            {
                _isRefreshing = value;
                OnPropertyChanged(nameof(IsRefreshing));
            }
        }

        public ICommand RefreshCommand { get; set; }

        public MainPageViewModel()
        {
            Professionals = DummyProfessionalData.GetProfessionals();
            RefreshCommand = new Command(CmdRefresh);
        }

        private async void CmdRefresh()
        {
            IsRefreshing = true;
            await Task.Delay(3000);
            IsRefreshing = false;
        }

        public event PropertyChangedEventHandler PropertyChanged;

        private void OnPropertyChanged(string property)
        {
            if (PropertyChanged != null)
                PropertyChanged(this, new PropertyChangedEventArgs(property));
        }
    }
}
After that open MainPage.xaml page and start our UI design. First, we call DataGrid namespace as dg and design our columns with Title, bind the PropertyName, width size. Bind ItemSource, SelectedItem, refershCommand. This page design code is given below.
<?xml version="1.0" encoding="utf-8"?>
<ContentPage xmlns="http://xamarin.com/schemas/2014/forms"
             xmlns:x="http://schemas.microsoft.com/winfx/2009/xaml"
             xmlns:d="http://xamarin.com/schemas/2014/forms/design"
             xmlns:mc="http://schemas.openxmlformats.org/markup-compatibility/2006"
             xmlns:dg="clr-namespace:Xamarin.Forms.DataGrid;assembly=Xamarin.Forms.DataGrid"
             x:Class="XFDataGrid.MainPage">
    <ContentView>
        <!-- Place new controls here -->
        <dg:DataGrid ItemsSource="{Binding Professionals}" SelectionEnabled="True" SelectedItem="{Binding SelectedProfesstional}" RowHeight="70" HeaderHeight="50"
                    BorderColor="#CCCCCC" HeaderBackground="#E0E6F8" PullToRefreshCommand="{Binding RefreshCommand}" IsRefreshing="{Binding IsRefreshing}" ActiveRowColor="#8899AA">
            <x:Arguments>
                <ListViewCachingStrategy>RetainElement</ListViewCachingStrategy>
            </x:Arguments>
            <dg:DataGrid.HeaderFontSize>
                <OnIdiom x:TypeArguments="x:Double">
                    <OnIdiom.Tablet>15</OnIdiom.Tablet>
                    <OnIdiom.Phone>12</OnIdiom.Phone>
                </OnIdiom>
            </dg:DataGrid.HeaderFontSize>
            <dg:DataGrid.Columns>
                <dg:DataGridColumn Title="ID" PropertyName="Id" Width="1*"></dg:DataGridColumn>
                <dg:DataGridColumn PropertyName="Name" Width="2*">
                    <dg:DataGridColumn.FormattedTitle>
                        <FormattedString>
                            <Span Text="Name" FontSize="13" TextColor="Black" FontAttributes="Bold"/>
                        </FormattedString>
                    </dg:DataGridColumn.FormattedTitle>
                </dg:DataGridColumn>
                <dg:DataGridColumn Title="Desigination" PropertyName="Desigination" Width="2*"/>
                <dg:DataGridColumn Title="Domain" PropertyName="Domain" Width="2*"/>
                <dg:DataGridColumn Title="Exp" PropertyName="Experience" Width="1*"/>
            </dg:DataGrid.Columns>
            <dg:DataGrid.RowsBackgroundColorPalette>
                <dg:PaletteCollection>
                    <Color>#F2F2F2</Color>
                    <Color>#FFFFFF</Color>
                </dg:PaletteCollection>
            </dg:DataGrid.RowsBackgroundColorPalette>
        </dg:DataGrid>
    </ContentView>
</ContentPage>
Next open MainPage.xaml.cs and set BindingContext is MainPageViewModel as we done already. The source code here.
using System;
using System.Collections.Generic;
using System.ComponentModel;
using System.Linq;
using System.Text;
using System.Threading.Tasks;
using Xamarin.Forms;
using XFDataGrid.ViewModels;

namespace XFDataGrid
{
    // Learn more about making custom code visible in the Xamarin.Forms previewer
    // by visiting https://aka.ms/xamarinforms-previewer
    [DesignTimeVisible(false)]
    public partial class MainPage : ContentPage
    {
        public MainPage()
        {
            InitializeComponent();
            BindingContext = new MainPageViewModel();
        }
    }
}
Finally, initialize DataComponent in App Startup of App.xaml.cs class as below code.
using System;
using Xamarin.Forms;
using Xamarin.Forms.Xaml;
namespace XFDataGrid
{
public partial class App : Application
{
public App()
{
Xamarin.Forms.DataGrid.DataGridComponent.Init();
InitializeComponent();
MainPage = new MainPage();
}
protected override void OnStart()
{
}
protected override void OnSleep()
{
}
protected override void OnResume()
{
}
}
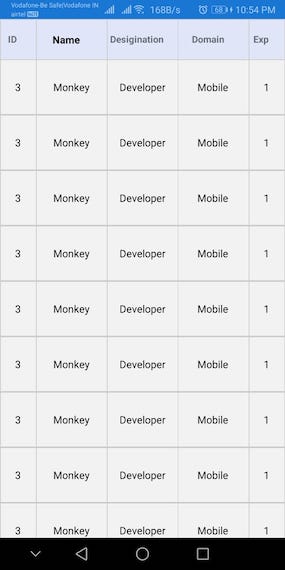
}Now, run your application and output like the below screenshot.
The Full Source Code is here – GitHub
Conclusion
I hope you all understand how to use DataGrid in Xamarin.Forms and this is helpful for all and thanks for reading