
Social Media Authentication In Angular
Introduction:
Social login uses existing login information from a social network provider (i.e. Facebook, Linkedin or Google, etc…) The user can sign into a third-party website instead of creating a new account specifically on that website.
Step 1:
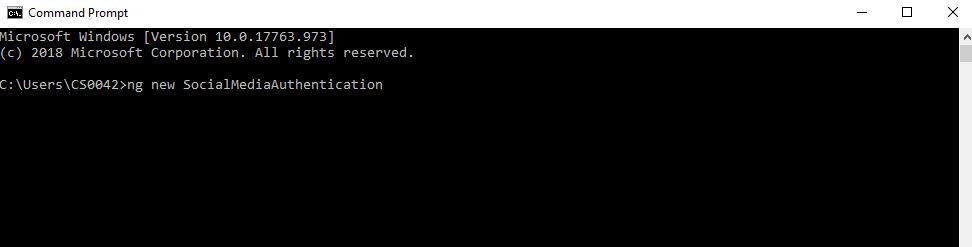
Create an you angular app using following command .
Step 2:
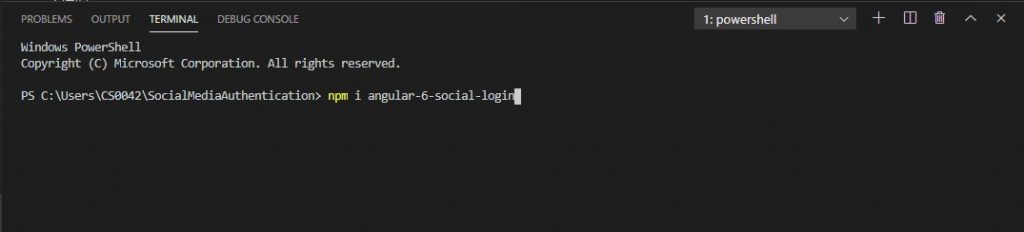
Open the above created project in Visual Studio code and install the npm using this command.
“ npm i angular-6-social-login”
Step 3:
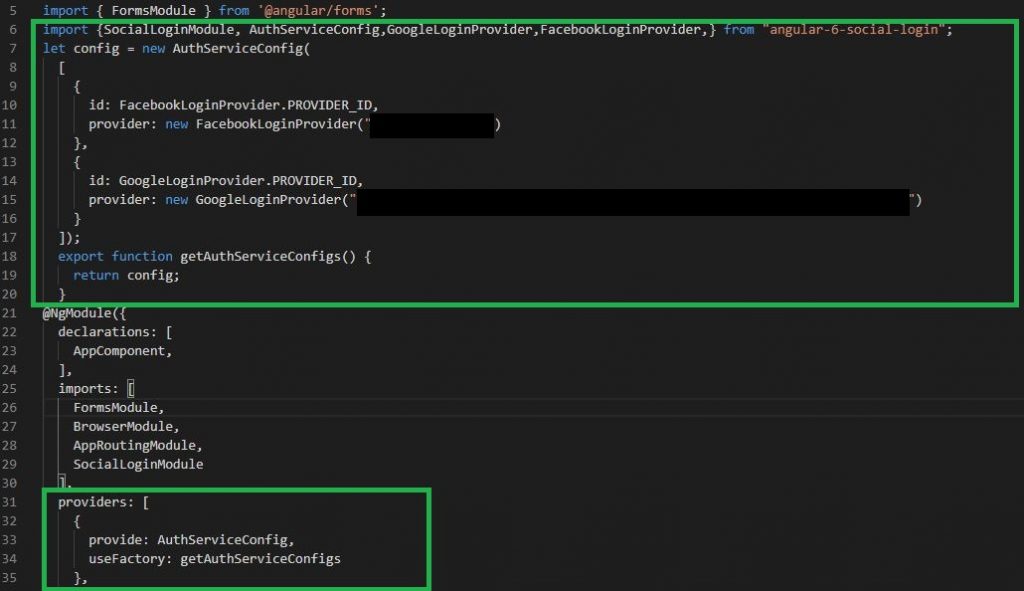
Once you install the npm file, add a reference to your app.module.ts file
import {SocialLoginModule, AuthServiceConfig,GoogleLoginProvider,FacebookLoginProvider,}
from "angular-6-social-login";
How to get Facebook API Key:
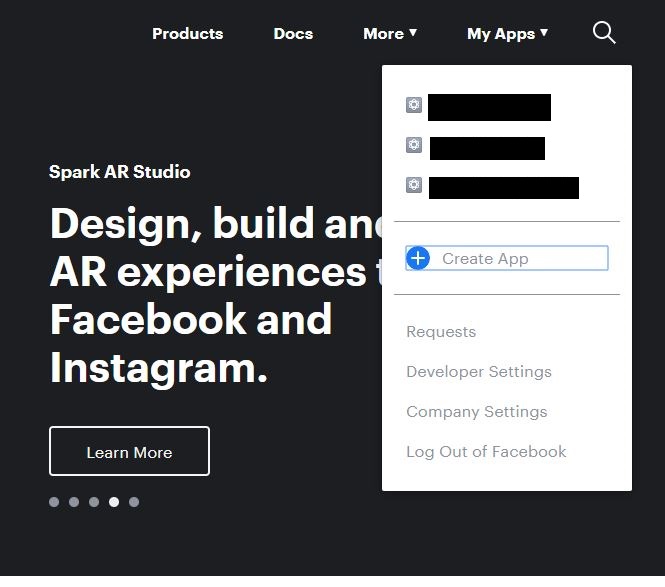
To open the Facebook developer page, click here
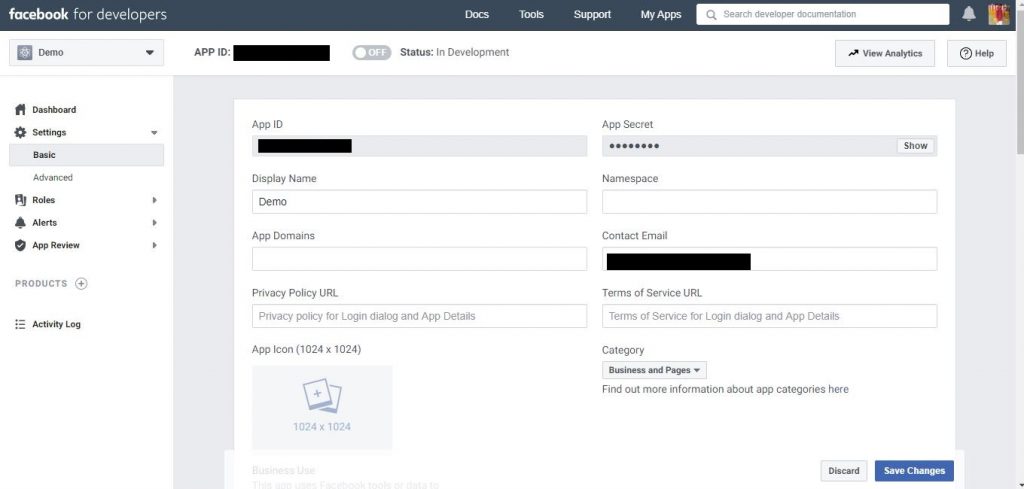
Once the URL is open, sign into your Facebook account with your username and password. After you are successfully logged in, you can create the new app, refer to the below screenshot.
Once you have processed your Facebook ID, generate for your app page, refer to the below screenshot.
How to get Google API Key:
To open Google developer console page ,click here.
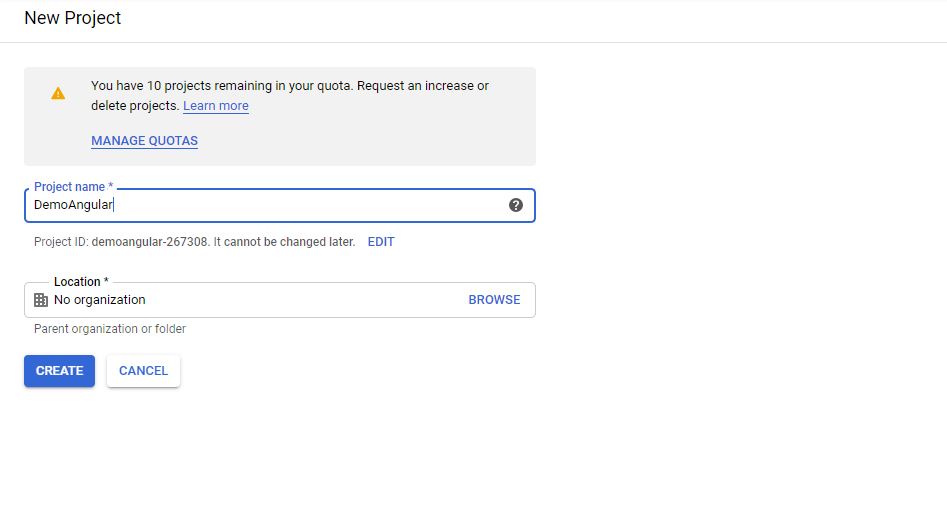
Sign into your Google account. Once done the login process, you can create the app. Refer to the below screenshot.
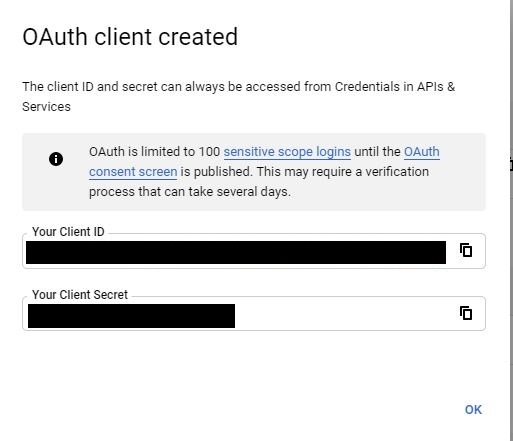
Once you have credited the app by enabling Gmail, select OAuth client. After generating your client ID, refer to the below screenshot:
Step 4 :
Once you get the Facebook ID and the Google account ID, you can paste the app.module.ts code:
let config = new AuthServiceConfig(
  [
    {
      id: FacebookLoginProvider.PROVIDER_ID,
      provider: new FacebookLoginProvider("Your App Id")
    },
    {
      id: GoogleLoginProvider.PROVIDER_ID,
      provider: new GoogleLoginProvider("Your Client Id")
    }
  ]);
  export function getAuthServiceConfigs() {
    return config;
  }
Step 5 :
You can add the service config file provided below.
 providers: [
    {
      provide: AuthServiceConfig,
      useFactory: getAuthServiceConfigs
    },
  ],
Providers – Services present in one of the modules which is to be used in the other modules or components. Once a service is included in the providers it becomes accessible in all parts of that application.
Step 6 :
Open your appcomponent.ts, add the reference file using the below code:
import { AuthService,FacebookLoginProvider,GoogleLoginProvider,} from 'angular-6-social-login';

@Component({
  selector: 'app-root',
  templateUrl: './app.component.html',
  styleUrls: ['./app.component.css']
})
export class AppComponent {
  title = 'SocialMediaAuthentication';
Step 7:
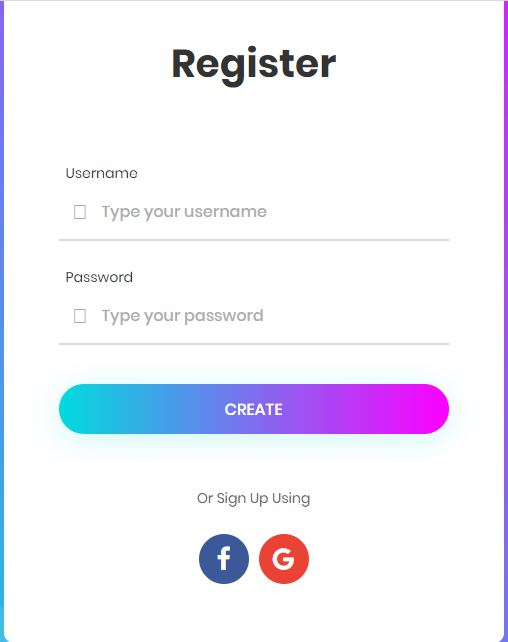
The next step is to add an app.component.html file by pasting the below code.
<img src="{{userimage}}">
<div class="wrap-input100 validate-input m-b-23" data-validate = "Username is reauired">
<span class="label-input100">Username</span>
<input class="input100" id="name" id="name" type="text" [(ngModel)]="username" name="username" placeholder="Type your username">
<span class="focus-input100" data-symbol=""></span>
</div>
<div class="wrap-input100 validate-input" data-validate="Password is required">
<span class="label-input100">Password</span>
<input class="input100" [(ngModel)]="pass" type="password" name="passd" id="passd" placeholder="Type your password">
<span class="focus-input100" data-symbol=""></span>
</div>
<div class="flex-c-m">
<a (click)="socialsigin('facebook')" class="login100-social-item bg1">
<i class="fa fa-facebook" style="color: #fff;"></i>
</a>
<a (click)="socialsigin('google')" class="login100-social-item bg3">
<i class="fa fa-google" style="color: #fff;"></i>
</a>
</div>
Step 8:
Open app.component.ts, add the sign method using the below code.
    socialsigin(platform:string)
      {
        let socialPlatformProvider;
        if(platform=="facebook"){
            socialPlatformProvider = FacebookLoginProvider.PROVIDER_ID;
        }
        else if(platform=="gmail")
    {
        socialPlatformProvider=GoogleLoginProvider.PROVIDER_ID;
    }
    this.socialservice.signIn(socialPlatformProvider).then((userdata)=>
        {
                this.assginuseerdetails=userdata
       });
    }
Step 9:
Once completed up to this step, finally, you can assign the account details for two data binds:
this.userimage=this.assginuseerdetails.image
this.username=this.assginuseerdetails.email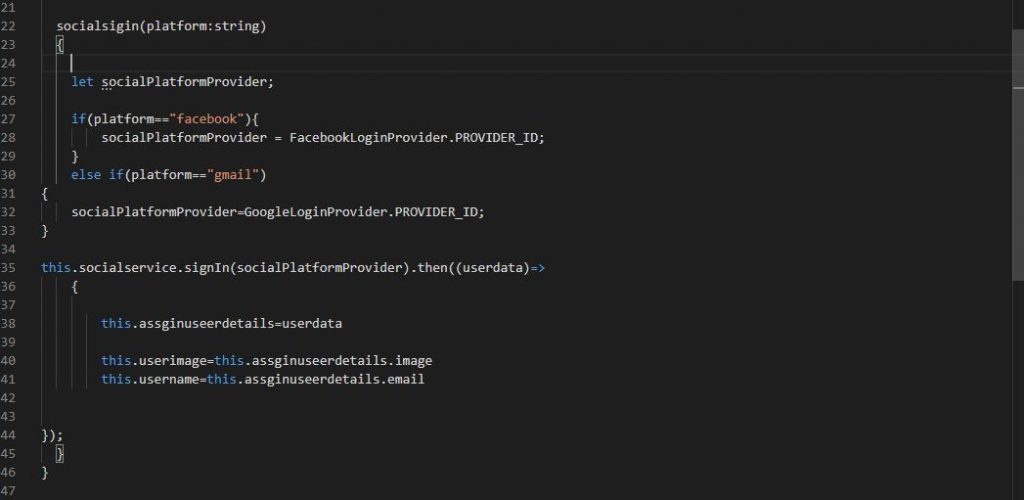
Step 10:
Now execute the following command: ng serve –open
The app will open in your default browser:
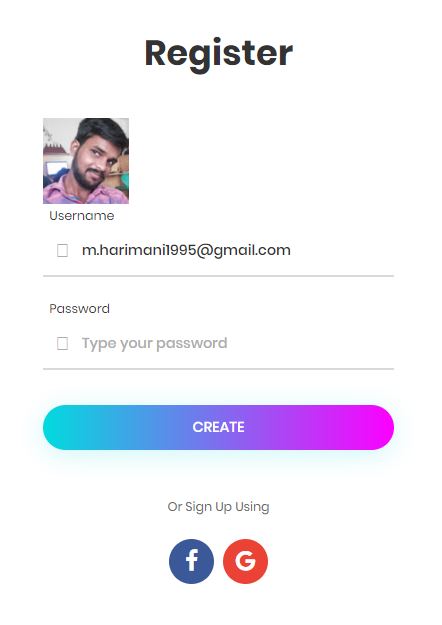
Step 11:
Now click the Facebook icon popup page. You can login to your Facebook ID once you finished the authentication.
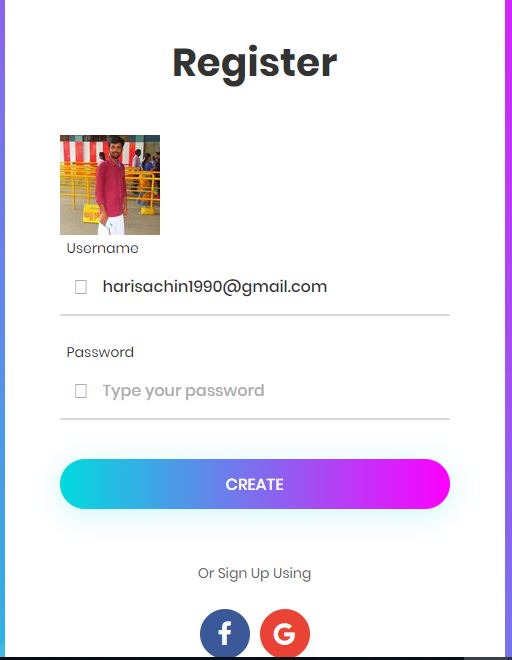
Next, click the Gmail icon in the popup and enter your Google account details. Once done, the authentication gets the account details, refer to the below screenshot.
If you want this project source code please referred here.
Summary:
In this article, we have learned how to authenticate social media in Angular and how to get an API key.
Happy Coding !

Hello this is Haridhass, working as Software Developer in Congenial Studioss for more than 2+ years. Skilled in Angular,C#.NET, NodeJs,SQL Server,WebApi,Html,CSS,JavaScript,TypeScript