
Create Login With Web API Using Azure SQL Server-I
First we create Azure SQL Server Database. Go to Azure Portal.
Create Azure SQL server database:
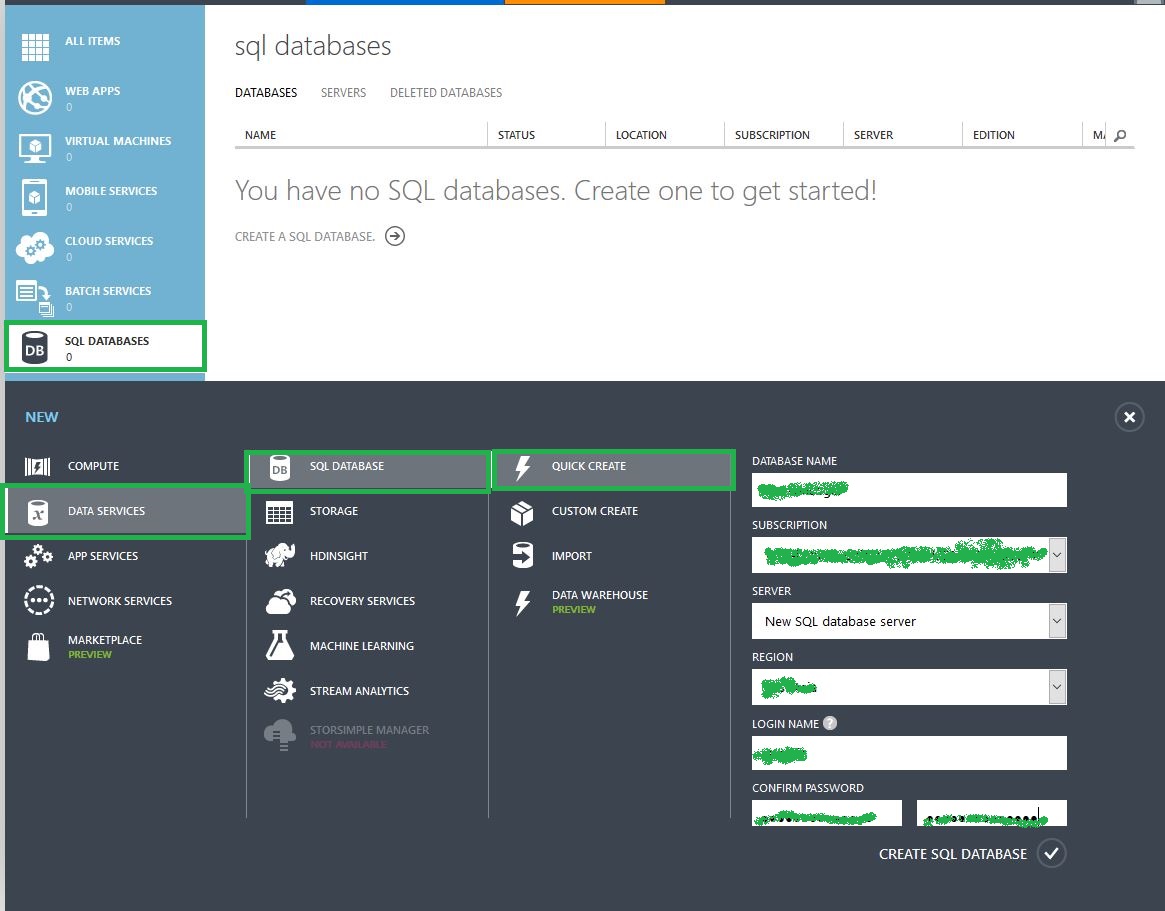
Step 1: Create SQL Database and Database server. Go to portal bottom + DATA SERVICES->SQL DATABASE->QUICK CREATE then give your database name, server name, and password. After that click create SQL Database.
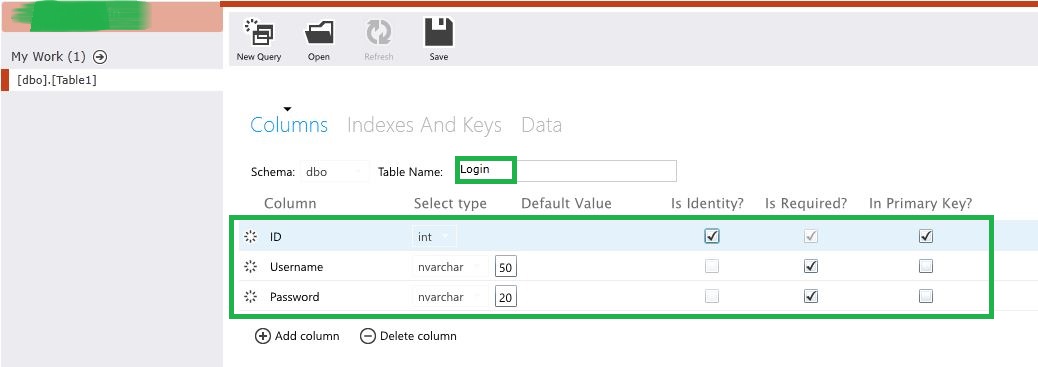
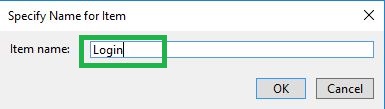
Step 2 : Next open SQL Database Design View, then Create New Table and name for Login.

Step 3 : Then Create Login Table Rows. Here create three rows: ID, Username, Password. After creating rows go to Visual studio and create New WEB API.
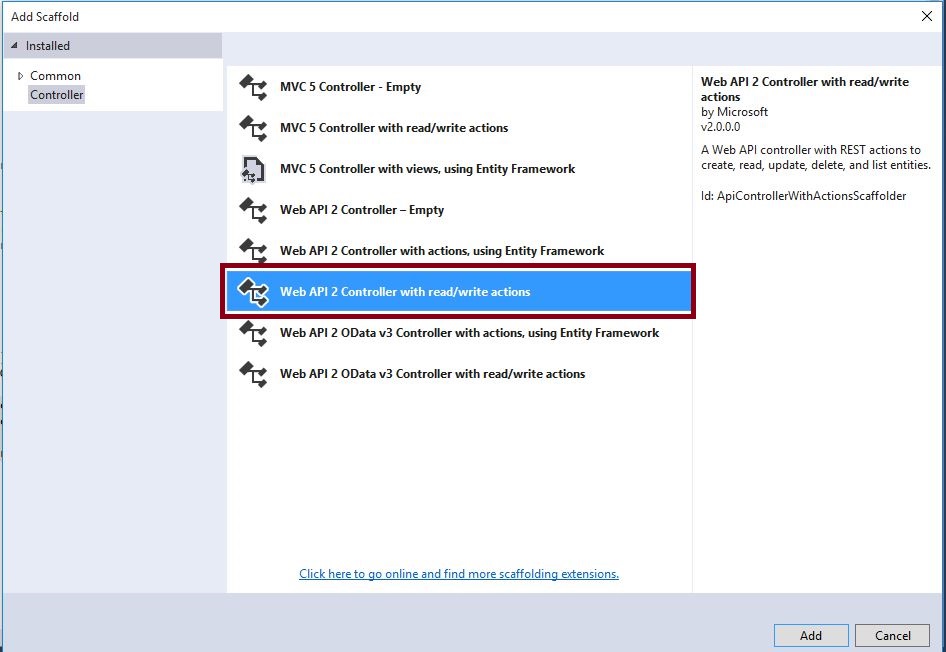
CREATE WEB API :
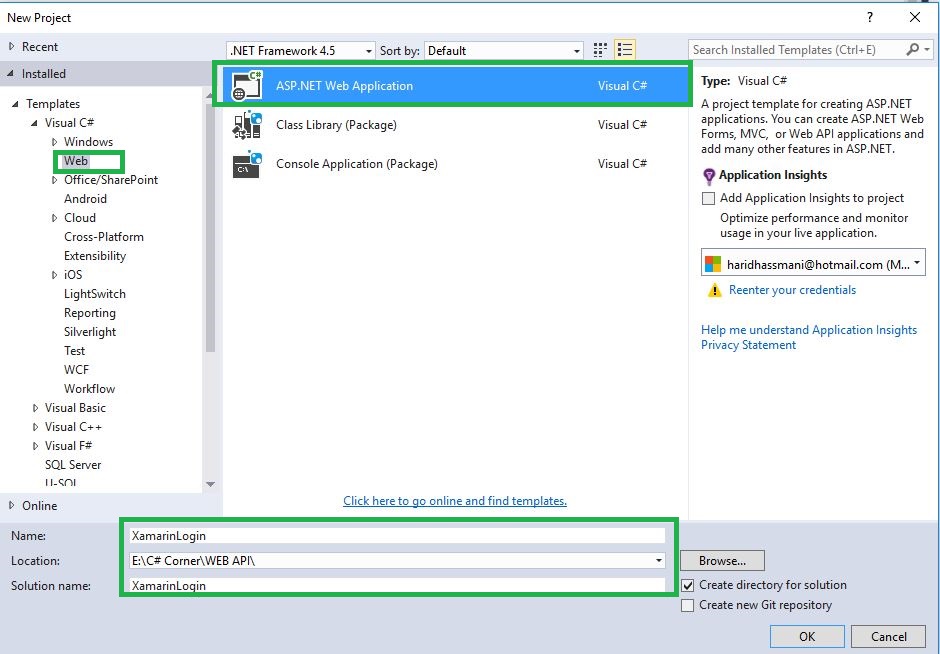
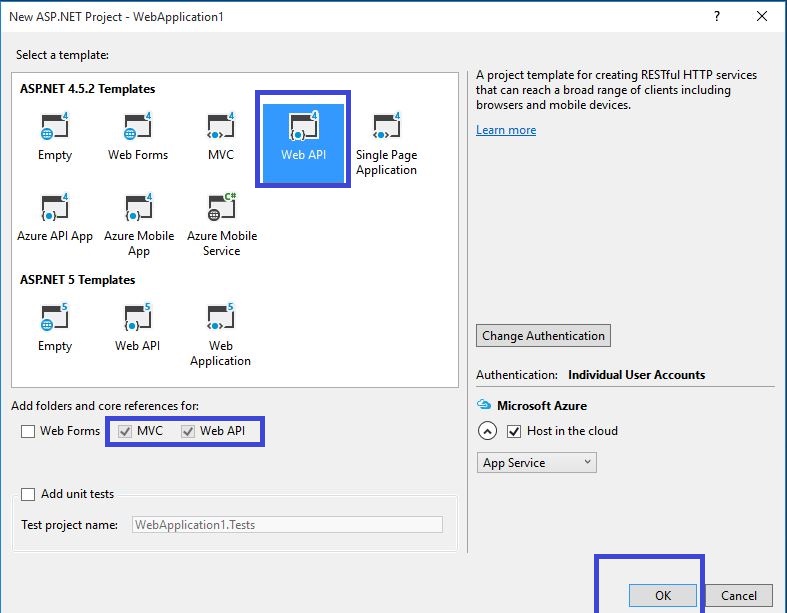
Step 4 : Open Visual Studio->New Project->Templates->Visual C#->Web ->ASP.NET Web Application, then open new pop up window and select WEB API. Then give Project Name and Project Location.
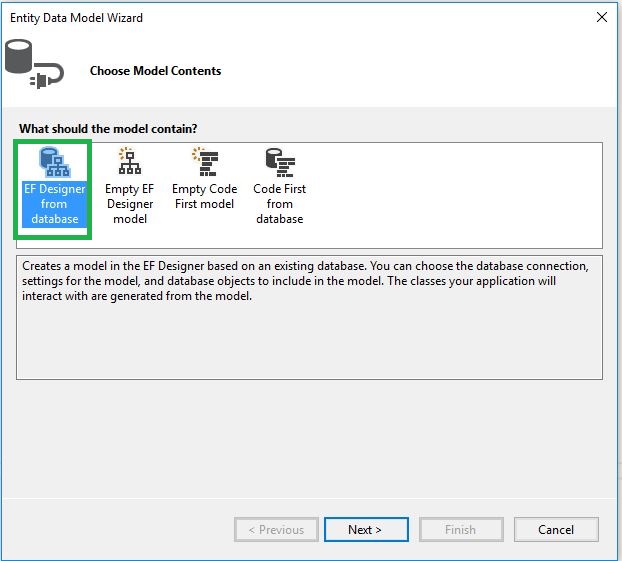
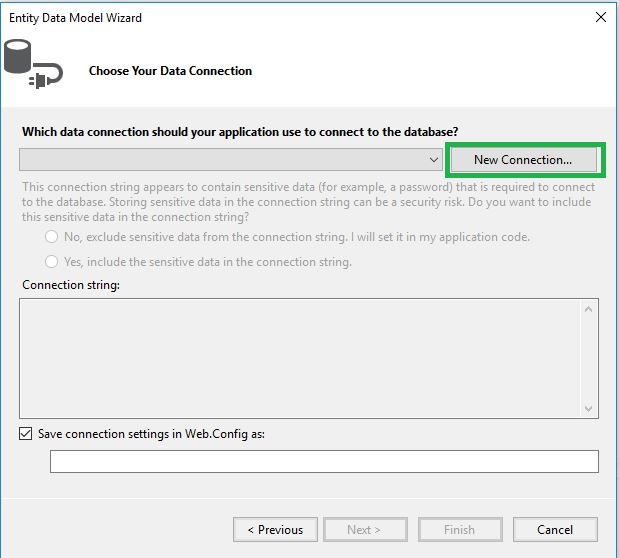
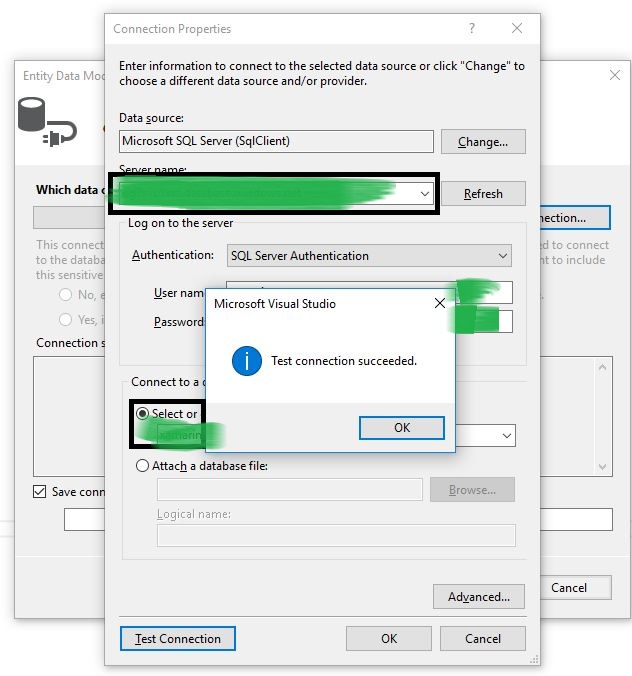
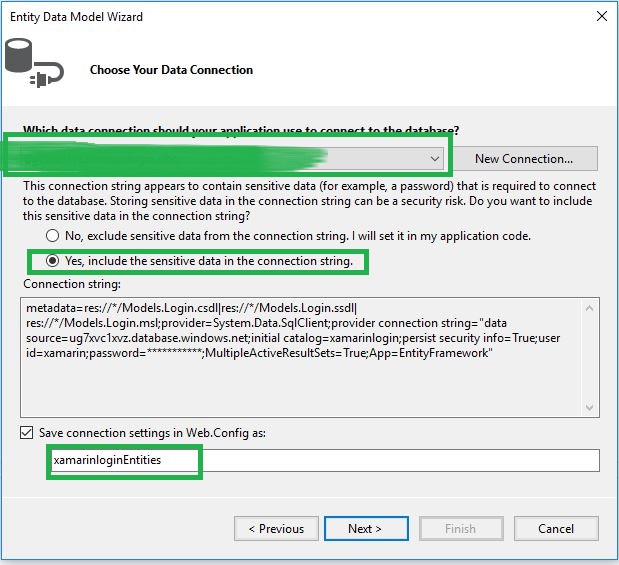
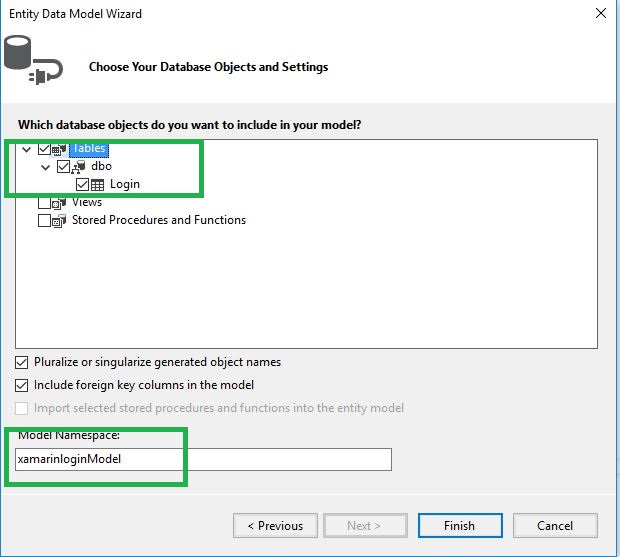
Step 6 : Select EF Designer from Database.

 var json = config.Formatters.JsonFormatter;
 json.SerializerSettings.PreserveReferencesHandling = Newtonsoft.Json.PreserveReferencesHandling.Objects;
 json.SerializerSettings.ContractResolver = new CamelCasePropertyNamesContractResolver();
 config.Formatters.Remove(config.Formatters.XmlFormatter);
using System;
using System.Collections.Generic;
using System.Linq;
using System.Net;
using System.Net.Http;
using System.Web.Http;
using XamarinLogin.Models;
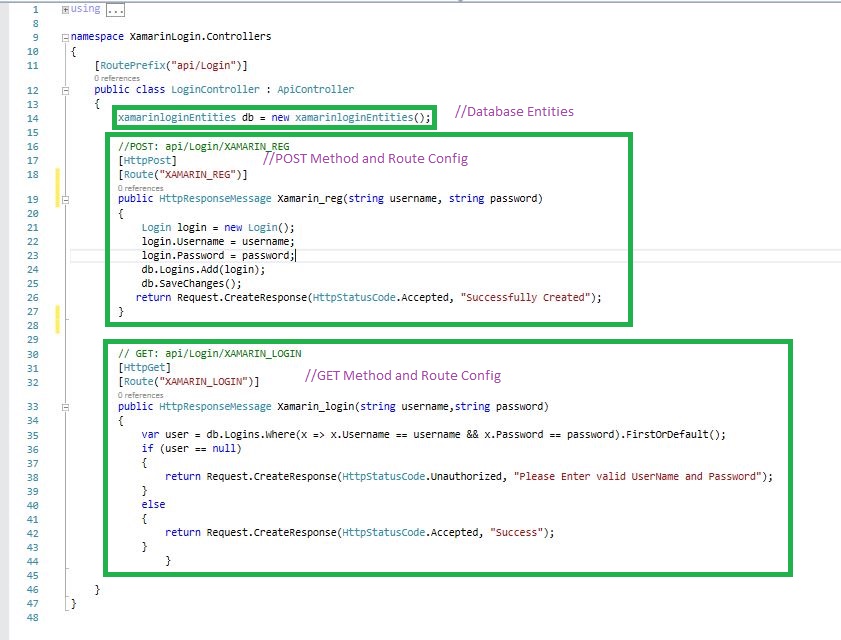
namespace XamarinLogin.Controllers
{
public class LoginController: ApiController
{
xamarinloginEntities db = new xamarinloginEntities();
/
[HttpPost]
[ActionName("XAMARIN_REG")]
// POST: api/Login
public HttpResponseMessage Xamarin_reg(string username, string password)
{
Login login = new Login();
login.Username = username;
login.Password = password;
db.Logins.Add(login);
db.SaveChanges();
return Request.CreateResponse(HttpStatusCode.Accepted, "Successfully Created");
}
[HttpGet]
[ActionName("XAMARIN_Login")]
// GET: api/Login/5
public HttpResponseMessage Xamarin_login(string username, string password)
{
var user = db.Logins.Where(x => x.Username == username && x.Password == password).FirstOrDefault();
if (user == null)
{
return Request.CreateResponse(HttpStatusCode.Unauthorized, "Please Enter valid UserName and Password");
}
else
{
return Request.CreateResponse(HttpStatusCode.Accepted, "Success");
}
}
}
}

Anbu Mani(Microsoft MVP) is working Software Engineer in Changepond Technologies, Chennai, Tamilnadu, India. Having 4+ years of experience and his area of interest is C#, ASP.NET, SQL Server, Xamarin and Xamarin Forms,Azure…etc
Thanks for the wonderful post
This is really useful, thanks.