
Xamarin Forms FCM Setup Configuration – Part I
Introduction
This article demonstrates how to set up the FCM push notifications configuration in google console for Xamarin Forms.
Overview of Firebase Cloud Messaging
Firebase Cloud Messaging (FCM) is a service that facilitates messaging between mobile apps and server applications. This article provides an overview of how FCM works, and it explains how to configure Google Services so that your app can use FCM.
More about Firebase Cloud Messaging.
Let’s start…!?
Firebase Setup:-
Step 1:
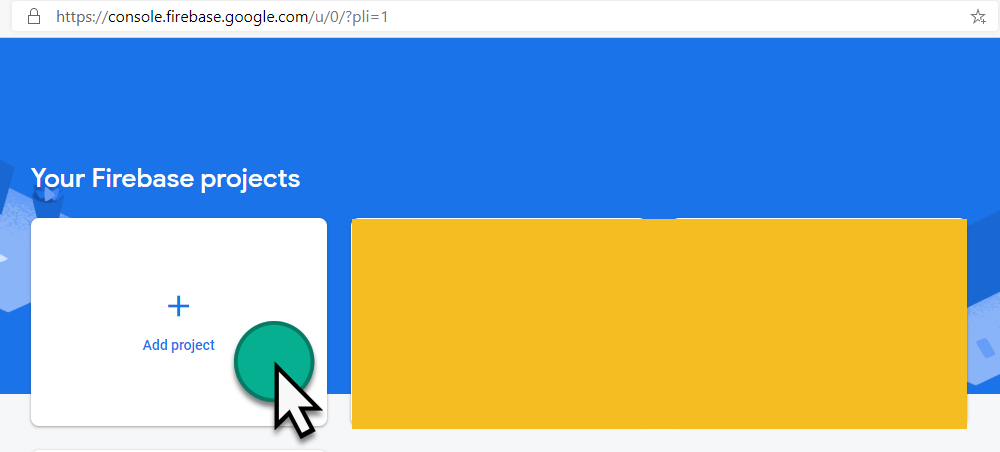
Login into https://console.firebase.google.com. Then click on Create a project if you are creating a project for the first time or click the Add Project (+) option in the dashboard.
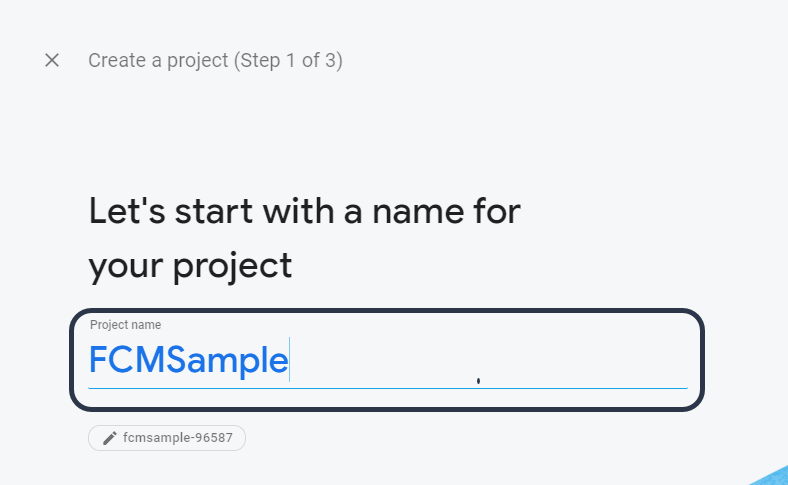
Then, “Create a Project Wizard” will be open which will comprise of 3 steps.
Wizard 1:
Enter a Project Name, Then click “Continue”.
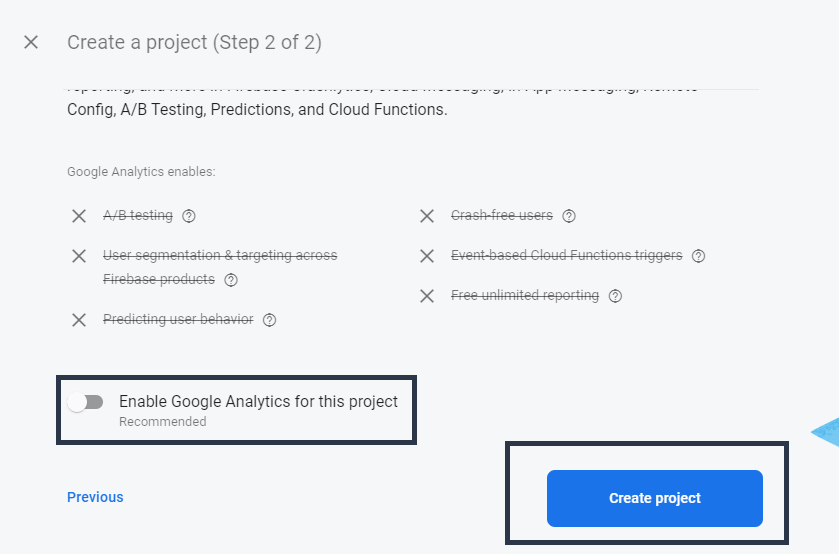
Wizard 2:
In case if you’re require analytics to this project then enable the Analytics toggle button. In this walkthrough, Here I disabled it since it is not required. Then click the “Create Project” button.
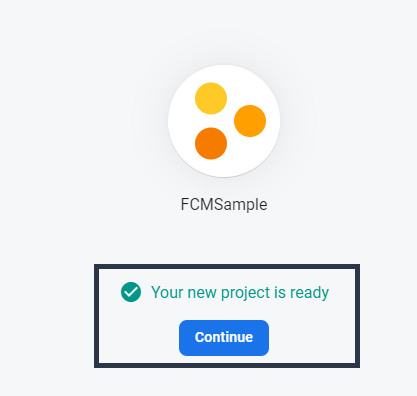
Once the project creation is completed, your new project is ready. Click on the “Continue” button to view the Dashboard.
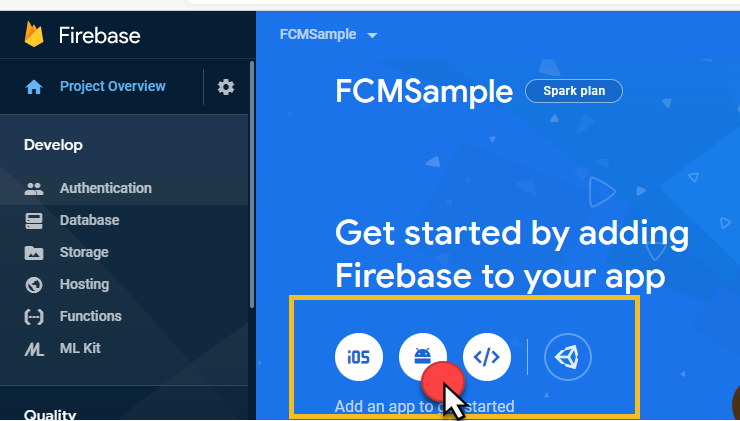
Step 2:
Now we need to configure both Android & iOS projects. Here, first I am clicking on the Android icon to configure the Android project.
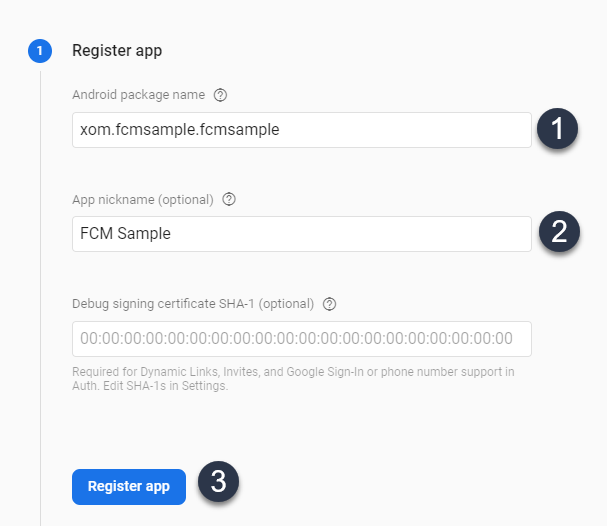
Android:-
The below Android creation wizard page will be loaded.
Wizard 1:
On this page, we need to Register our Application with Package Name and other optional details. Then click the “Register App” button.
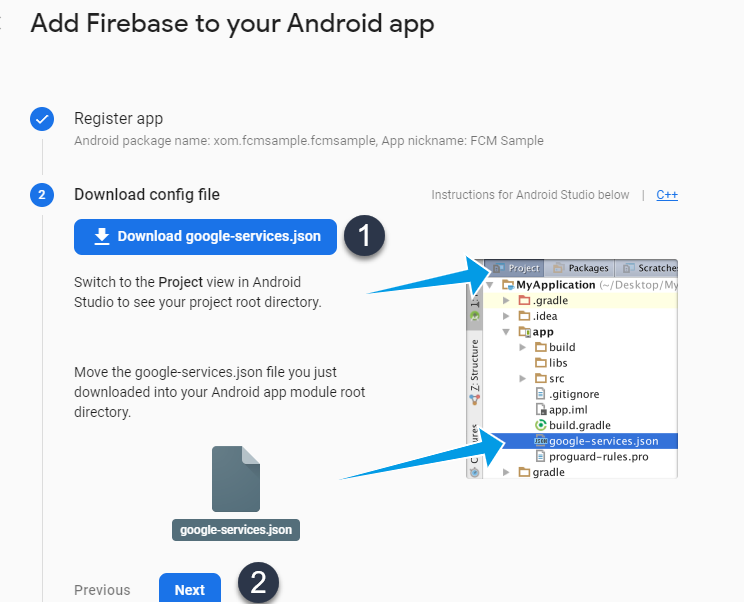
Wizard 2:
Once registered, you will be prompted to the next wizard for download the configuration file. Download the “google-services.json” file.
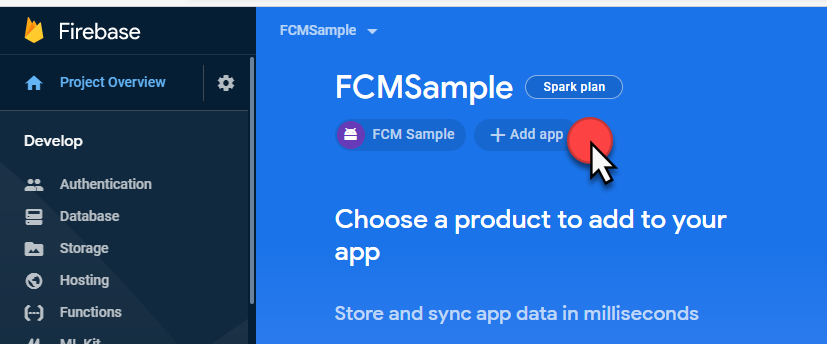
iOS Setup:-
After completing the Android project configuration go to the Dashboard page. Click “Add App” and select iOS.
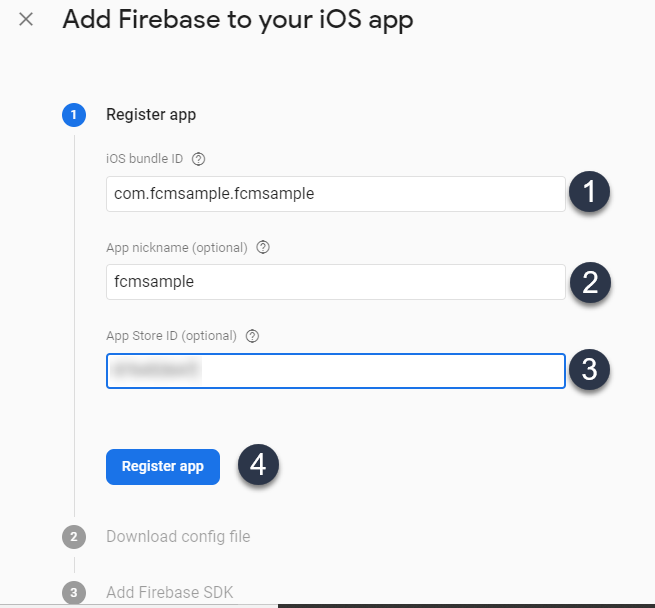
Wizard 1:
This below iOS configuration wizard will be loaded. Register the application with iOS Bundle Id and other optional details. Then click the “Register App” button.
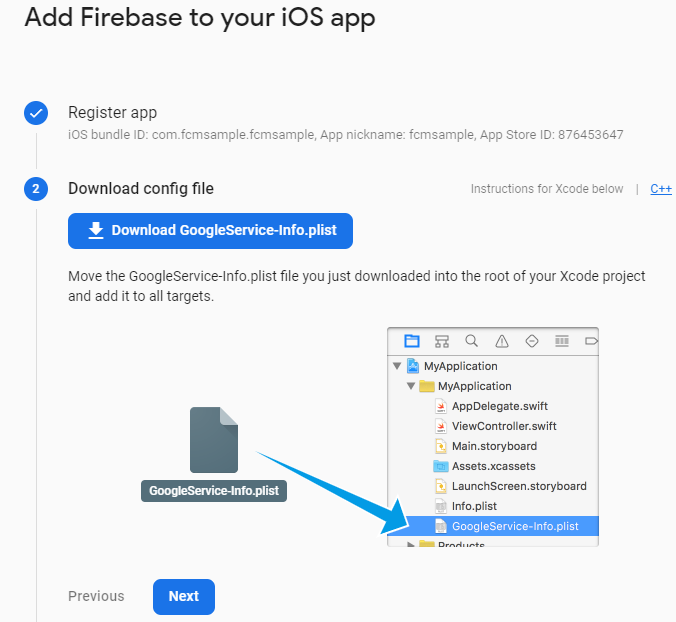
Wizard 2:
Once registered, you will be prompted to the next wizard for download the configuration file.Here, Download the “GoogleService-Info.plist” file.
Step 3:
Click the “Next” button in the “Add Firebase SDK” wizard.
In the “Run your app to verify installation” wizard, click “Skip this step” option to complete the Android & iOS project configuration.
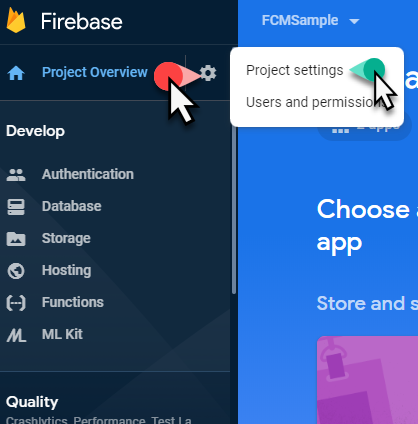
Once it is done, click the settings icon to open the “Project settings”.
Step 4:
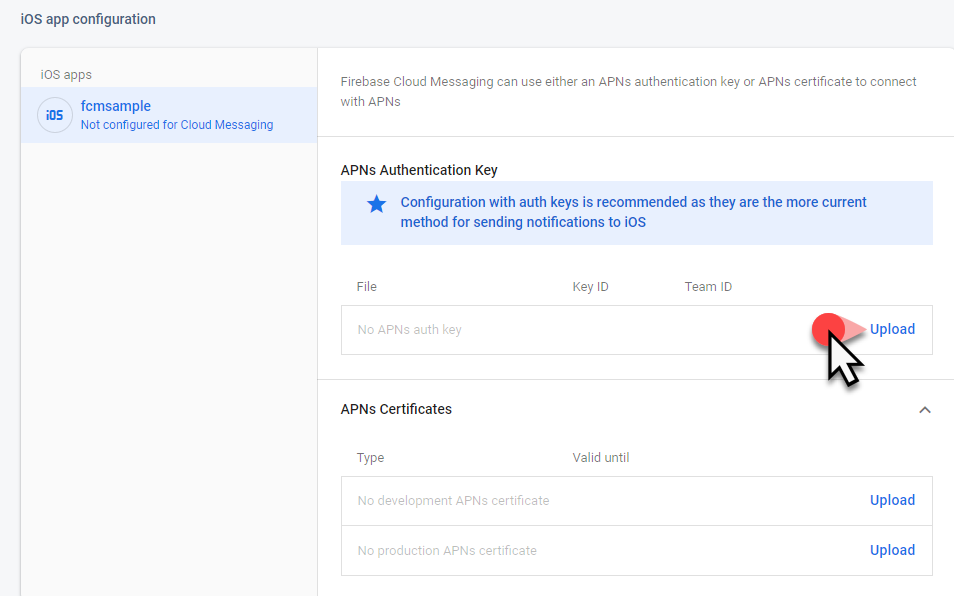
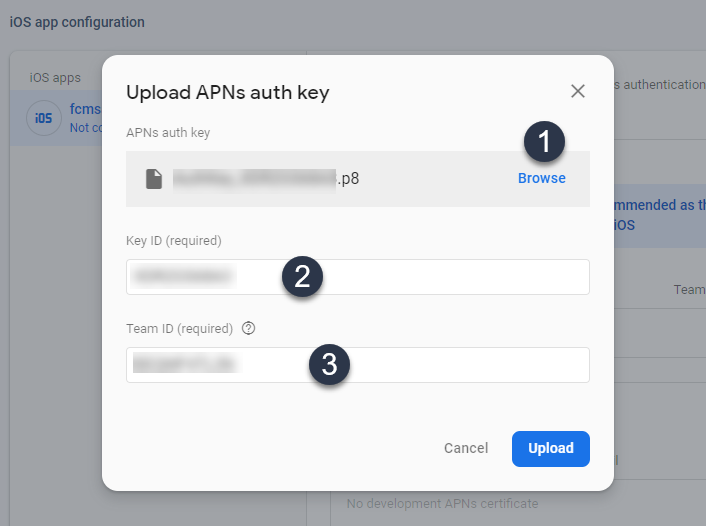
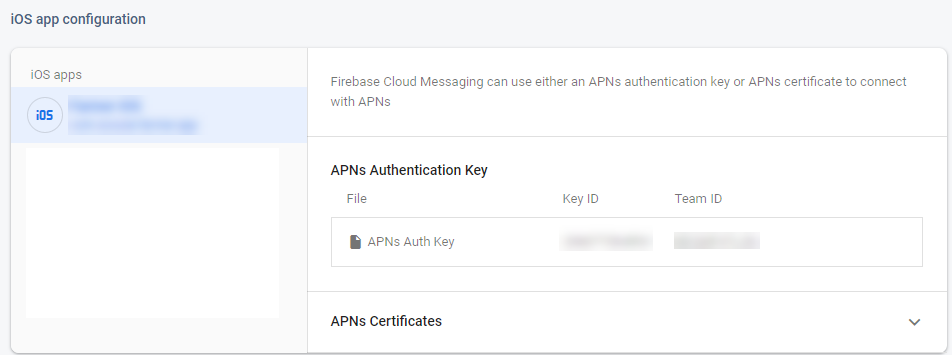
Select the “Cloud Messaging” option menu, then select the iOS application. Note that the “APNs Authentication key” will be empty. We should upload and configure it with the p8 file. To do it click the upload button which will show a popup for configuring the APNs authentication key.
Step 5:
Now, Browse and upload the .p8 file (eg: xamarin.P8 File) and enter the Key ID and Team ID. Click the Upload button.
Check here to create P8 File & Project Configuration in Developer Console: …
We have completed the Firebase setup in the console.
Next, we gonna to create a Xamarin Forms application and config this app with FCM.Check my second part of this article is here “FCM Implementation Xamarin Forms – Part II” .

Anbu Mani(Microsoft MVP) is working Software Engineer in Changepond Technologies, Chennai, Tamilnadu, India. Having 4+ years of experience and his area of interest is C#, ASP.NET, SQL Server, Xamarin and Xamarin Forms,Azure…etc