
Custom Render – Xamarin Forms
Introduction
Custom Render is way to customize a behaviour and appearance of the Xamarin forms control. With the help of custom render you can render control on all platform with same appearance or different appearance and behaviour . Also developer can create their custom control like CheckBox, Radio Button..etc.
For understanding of Custom Render I am going to create custom render for Entry.
Implementation of Custom Render
Step 1
Create a new project in your Visual Studio.
File –>New–>Project–>Cross Platform.
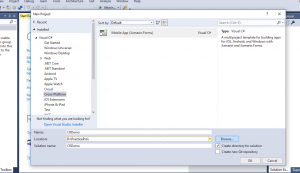
In this image you can see I have selected Cross-Platform -> Mobile App. Give a name to your project and click on OK Button.
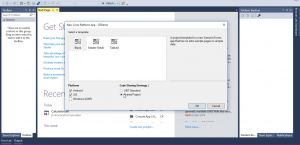
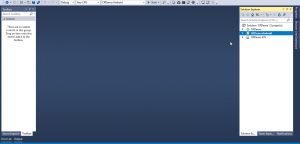
In next step select platform and code sharing strategy. After that your project will be created which look like following screen.
Step 2
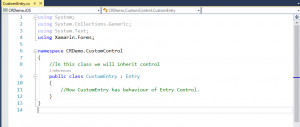
Now you need to create a class in Shared Project. I have created with the name of Custom Entry. This class will help to extend the Xamarin Forms control. After that you need to Inherit Entry Class based on following image.
C# CODE
namespace CRDemo.CustomControl
{
//In this class we will inherit control
public class CustomEntry : Entry
{
//Now CustomEntry has behaviour of Entry Control.
}
}
Now we need to create Custom Render class platform wise. So for that first I am going to show you how we can create on android.
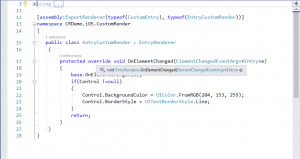
We need to write click on Android project and need to add one class with the name of Custom Render this name you can change based on your suitability.

Here you can see I am doing registry and adding the behaviour of control. In ExportRender first type is the class which we have created in shared project and second one would be CustomRender class.
C# Code
[assembly: ExportRenderer(typeof(CustomEntry),typeof(EntryCustomRender))]//Registry
namespace CRDemo.Droid.CustomRender
{
public class EntryCustomRender : EntryRenderer
{
public EntryCustomRender(Context context) : base(context)
{
}
protected override void OnElementChanged(ElementChangedEventArgs<Entry>e)
{
base.OnElementChanged(e);
if(Control!=null)
{
Control.SetBackgroundColor(Android.Graphics.Color.PaleGreen);
}
}
}
}
For iOS
same way we need to do.
C# CODE
[assembly:ExportRenderer(typeof(CustomEntry), typeof(EntryCustomRender))]
namespace CRDemo.iOS.CustomRender
{
public class EntryCustomRender : EntryRenderer
{
protected override void OnElementChanged(ElementChangedEventArgs<Entry>e)
{
base.OnElementChanged(e);
if(Control !=null)
{
Control.BackgroundColor = UIColor.FromRGB(204, 153, 255);
Control.BorderStyle = UITextBorderStyle.Line;
}
return;
}
}
}
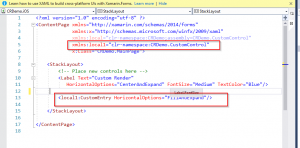
Now, our custom render for Entry is ready for use. We need to add this control in our UI.
For that open your main page in shared project. And add following code.
XAML CODE
<?xml version="1.0" encoding="utf-8" ?>
<ContentPage xmlns="http://xamarin.com/schemas/2014/forms"
xmlns:x="http://schemas.microsoft.com/winfx/2009/xaml"
xmlns:local="clr-namespace:CRDemo;assembly=CRDemo.CustomControl"
xmlns:local1="clr-namespace:CRDemo.CustomControl"
x:Class="CRDemo.MainPage">
<StackLayout>
<!-- Place new controls here -->
<Label Text="Custom Render"
HorizontalOptions="CenterAndExpand" FontSize="Medium" TextColor="Blue"/>
<!--<Entry HorizontalOptions="FillAndExpand"/>-->
<local1:CustomEntry HorizontalOptions="FillAndExpand"/>
</StackLayout>
</ContentPage>
Step 3
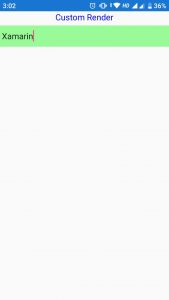
We need to build and deploy project.
OUTPUT
Summary
we learn about how to create custom render in Xamarin Forms project, and what is the use of Custom Render.
For Source code click here

I am Software Engineer in Canary’s Automation Pvt Ltd. I worked as Xamarin and Mobile DevOps Consultant. experience in Xamarin forms , .net ,Asp.net, C#, SqlServer, Html, javascript.